

EASY DIY AUTUMN WALL DÉCOR
How to Create Multi-Layered Abstract Wall Painting – Easy Beginner Wall Décor Tutorial
EIGHT EASY STEPS TO A PROFESSIONAL-LOOKING DIY ARTWORK
Creative beginner-level abstract art painting…that doesn’t look like beginner art!

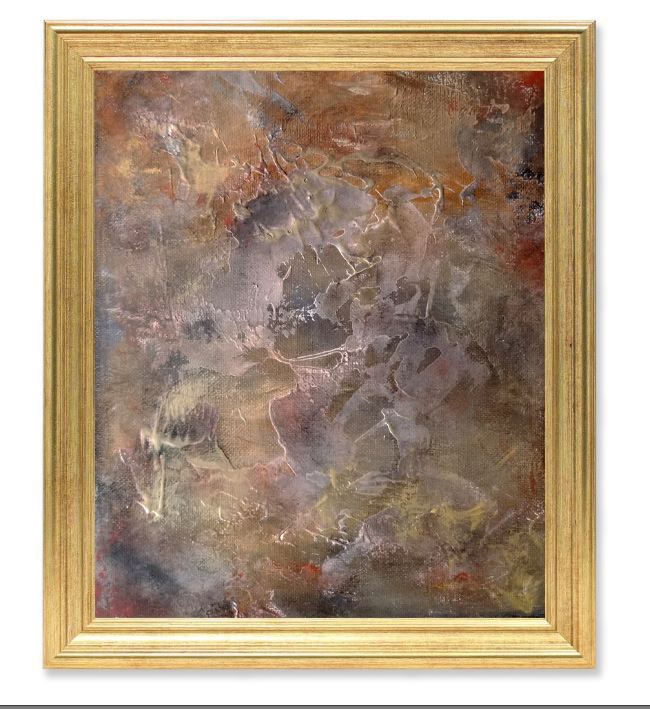
AUTUMN FIRE
ART TUTORIALS FOR BEGINNERS
Creating the painting I call AUTUMN FIRE
Lots of warm colors and depth due to various tones and textures applied over a base painting!
Use the following items to create this painting (or use whatever colors you like – also see my tutorial on a similar painting called SEA with blues, turquoise, greens, gold)
** MATERIALS USED: SEE BELOW FOR FULL LIST **
OVERVIEW:
Working with an ground/under layer; applied texture to top; painting top layer with acrylics.
ARTIST TIP: This is a great way to cover a painting you don’t like and create something very impressive!
YOUTUBE VIDEO: (speed process) https://youtu.be/Rm1LV6jQt_M
STEP ONE:
Create a simple painting of various colors on your canvas. Use colors that are similar/complementary to the final painting.
FIRST LAYER - BASIC PAINTING OF WARM TONES + GREY
-Canvas - shown 8” x 10” art board
For example, this original design had warm white/soft red/grey.
DRY thoroughly (at least 24 hours is best).

DRIED UNDERLAYER - ADDED TEXTURE IN ABSTRACT PATTERN
-Matte modeling paste
-Fiber paste or absorbent ground
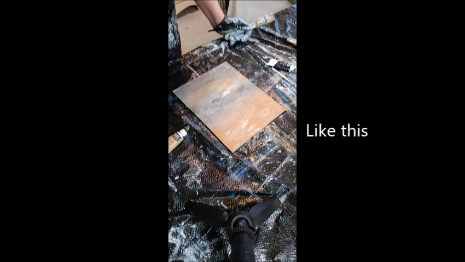
STEP TWO:
Apply your texture paste. I used a matte modeling paste and fiber paste mixed together. This will give the texture “tooth” to grab the colors.
¾ modeling past + ¼ fiber paste -or- absorbent ground
Let dry thoroughly.

STEP THREE:
Apply a small bit of base color. Here I used the soft warm red color (basic acrylic with a little water). Rub it into the texture in various areas, but don’t cover the entire painting. Only apply it to the texture paste areas.

SEE MATERIALS LIST


-Unbleached Titanium
-Red Oxide
-Burnt Umber
-Raw Sienna
STEP FOUR:
Add a little depth with black. I used a hi flow acrylic or you could use a thin black acrylic paint.
-Black (high flow)
Bits of black are added / rubbed into a couple of spots of the texture. Be careful and work with only very tiny bits of black. Black is very intense and is easy to go overboard (and it’s very hard to remove black!)

Add bits of metallic or mix it with color to add a shimmery additional tone!
STEP FIVE:
Add a little metallic – in this case gold. Either rub it into the painting in areas, or mix it with one of the colors to create a shimmery additional tone.
Artist Tip:
You could also add a little gold to your red or black and use this as a shimmery additional color!

STEP SIX:
Next, add more of your first color (in this case, red) to add even more depth. I also added a little Raw Sienna to give it more warmth (see materials list).
Continue to layer colors, adding very small bits of the colors to various areas to deepen and enhance the tones. Leave some light; make some deeper for a very multi-layered effect.
You can do this with the other colors until you achieve your perfect final artwork.
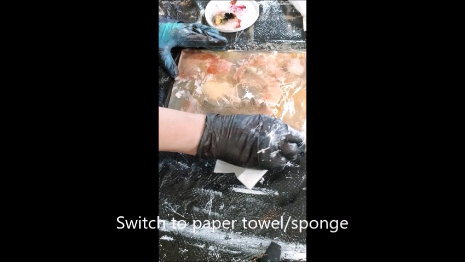
Artist Tip:
If you add too much color or decide to reduce the color, just put a little water on some paper towel and rub it away. It will soften or remove the color. Work with only a little water and work gently.
Let your final painting dry thoroughly.
YOU CAN GLAZE FINAL ARTWORK FOR ADDITIONAL LUSTER

STEP SEVEN:
After it has dried completely (I like to let paintings dry for a couple of days before I finish them with glaze or varnish).
-Gloss / Satin glaze medium
You can add a coat of gloss or stain glaze for additional richness (I almost always add a glaze). Then varnish and let dry thoroughly.
STEP EIGHT:
Frame and display!
You could create this on a large gallery-wrapped canvas for a ready-to-hang artwork, like this:

Create large art
Work on a gallery-wrapped canvas for a ready-to-hang finished artwork!
Finish the sides in either a white, black or coordinating color (see my video on finishing sides)
Or frame a smaller or art board canvas, like this:
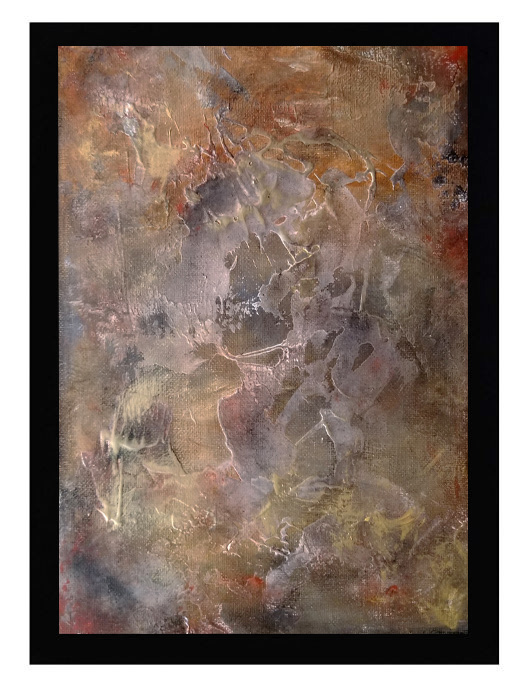

Frames shown:
BLACK FRAME:
GOLD FRAME:
See my other tutorials, and the similar SEA tutorial for another color option of this type of artwork:

SEA
Created with similar techniques
-Canvas - shown 8” x 10” art board
-Matte modeling paste
-Fiber paste or absorbent ground
-Unbleached Titanium
-Red Oxide
-Burnt Umber
-Raw Sienna
-Black (high flow)
-Gold ink
https://amzn.to/2TELrDr
-or-
Gold acrylic paint
-Gloss / Satin glaze medium
-Utility brush
-Mop brush